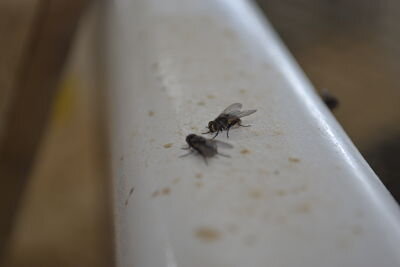
I hate flies. Working with calves however means that flies are a fact of life. Calves produce lots of liquid and lots of nutrients (ie poop) combine this with any spilled milk and grain - it is like a fly party. Besides the fact that flies are annoying, they are also a great vector for disease -a single fly can carry an infective dose of cryptosporidium. Maggots can get into wounds, infected navels, and can grow in manure or tissue that is damaged by diarrhea. For all these reasons, controlling flies is a major priority in the summer. For me, this summer has been one of the easiest to manage for fly control due to a few changes.
First thing. I started early. As soon I saw the first fly I started to implement fly control procedure. Since a female fly reaches maturity around 24 hours after hatching, will live for 15-30 days and lay up to 500 eggs in her lifetime catching it early is important. This means that for every female fly, she could have produced hundreds of eggs that are just waiting to hatch and emerge as an even bigger problem. If your fly population is already out of control and you spray the building or room with an insecticide to kill all the adult flies. The larvae will emerge, mature and lay more eggs, and you will have the same number of flies in another couple days. For this reason, you will have to spray the area for 3-5 days to get a true reduction in fly numbers by killing immature flies before they have a chance to lay more larvae. That’s why it is easier (and cheaper) to start early.
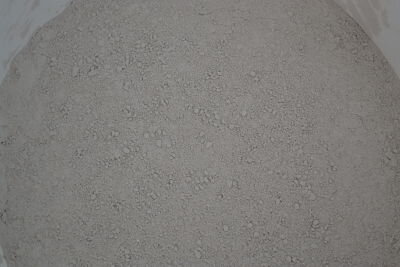
MS Schipper Dry Care Plus powder
Previously I used a 3-step protocol that was effective in managing the fly population but was labour intensive. This year, I added a new product - DryCare Plus, by MS Schippers. This powder that is dusted on the pen before bedding is a kaolin mineral product that is super absorbent. To be honest, I was skeptical of the product having much impact on the flies and tried it primarily to reduce ammonia and moisture in the bedding.
I started using the powder in May and was thinking it was working (no data), I was impressed with it as a drying agent for calves with diarrhea (image). However, I was not completely convinced it was worth the small cost and effort. Then I noticed something strange, it was mid-July and our flies were not out of control. I was not ordering a large volume of fly control products. In fact, the fly products left over from the previous summer were just sitting on the shelf when they should have been completely used at least a week prior. I also wasn’t seeing any maggots in the bedding, even when the pens were cleaned out after the calves were weaned. In previous years, if you dug in the corner of pens you would often find evidence of maggots or their pupa case. Now I don’t. It is now September and while I still see flies, but I think most of them come into the calf barn and hutches from elsewhere on the farm and are very easily managed. For me, the main downside of the DryCare Plus is remembering to apply it. It is just a light dusting to the pen before bedding goes down and is not hard, but whenever you add a new step it takes time to change your habit. In terms of cost, we have found regular application costs a lot less than using a whole bunch of fly products and seems to keep the bedding drier and fresher. In the mean time, my war on flies has changed from pitched daily battle, to a nagging task that involves rolling out fresh fly tape 1 or 2 times a day, which is only step 1 of our old 3 step program.
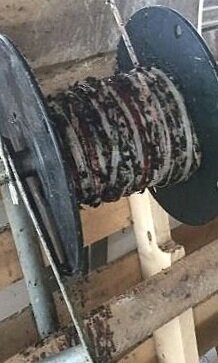
The used roll of sticky tape - gross!
Our original protocol involved advancing through a 3-step protocol. In previous years, I would typically reach the 3rd stage in mid- to late- July and would keep the fly population in check but felt like I was spending most of my time dealing with fly control. I can’t let my guard down and advancing the disgusting fly tape is probably the grossest part of my day.
Previous Protocol Pluses and Minuses
Step 1) The use of fly tape- Mr Sticky 1000 foot roll of sticky fly tape strung at a height of about 6 feet (or just taller than our tallest calf worker for any walkways). Cheaper and more efficient than the little fly rolls, Mr Sticky tape can be easily refreshed within minutes by only one person. The downside is rolling these up is kind of disgusting. Trapped flies get squished and rubbed off at the turning points of the tape, causing piles of dead squishy flies and it seems you can not crank the tape without getting some fly guts on you.
Also, the glue is STICKY. I recommend gloves when changing the rolls. The easiest is to tie the new roll to the end of the old roll. However, your gloves or hands will stick to them. The key is either gloves (which will stick to the tape) or cleaning your hands with some paint thinner. I keep some in the barn so I can remove any glue that gets on my hands, or scissors if when cutting the tape for a new roll. This saves you from a day of sticking to EVERYTHING.
Third downside, calves LOVE it. Don’t ask me why but if you are unrolling it and it dips down low enough for a calf to reach, they will instantly put it in their mouth. Seems like the first time they tasted flies and glue would be the last, but some calves can’t get enough of it, so don’t forget to keep it out of their reach.
Finally, the tape catches everything, this includes moths, butterflies, and occasionally small birds. So do not use if this an issue.
These minor inconveniences aside, these are an amazing, pesticide free, method to control flies and represents one of the first and highly effective stages of our fly control method.
Step 2) The second stage is the addition of fly bait stations, which need to be located on or near the ground where flies gather. Fly’s will be lured to the bait stations where they will be killed by the insecticide. I was surprised at how many flies these traps get. However, they do have to be properly managed. They can not be anywhere near animals are or anywhere it could get to water ways (drains, puddles, ground). I use wallpaper trays and place them around calf pens, and between hutches as needed. Out in the hutches I nailed them to small pieces of 2x4’s to keep them from blowing away. For the best effect sprinkling a small amount of fresh bait at least daily to make sure the smell to lure the flies in is strongest. Depending on how many flies are killed, I find it best to clean out the traps of dead flies and unconsumed bait every 2-3 weeks. In addition, since this work best at ground level, it seems something is always getting spilled in the trays (milk, bedding, water) so they will have to be carefully cleaned up and the residue discarded. The downside of the fly bait is it is an insecticide so it can kill any insect and will get rid of any beneficial ones.
Step 3) When flies can no longer be controlled by tape and bait, I add a residual fly spray to the rotation – Disvap V works great for me. This is a very effective product that can be applied weekly to the areas around the calves (again avoiding applying to calves or feed directly). If you identify where a large number of flies land, you can apply the fly spray to these areas and get really good kill rates. This will need to be re-applied as needed, in heavy fly times it could be weekly. The downside of this is the time it takes to apply, the cost, and like the fly bait it is an insecticide with the drawbacks associated with that.


